AdMob/GAM Console Setup
In the AdMob publisher console, select Mediation. In the Mediation Groups table, click "Create Mediation Group", or select an existing group to edit.
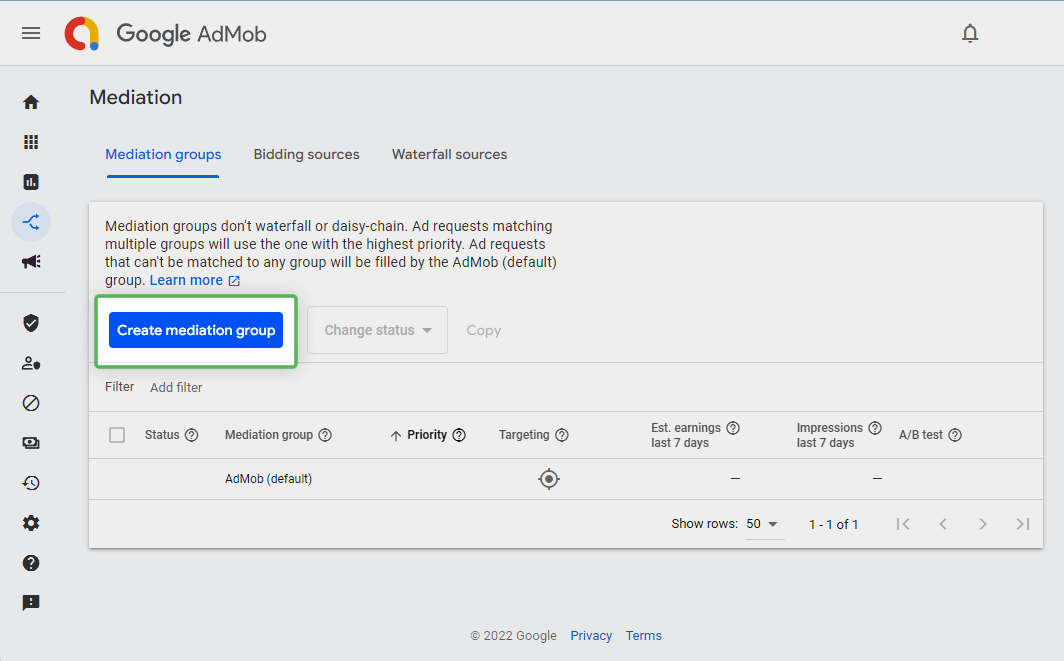
Create a new mediation group - or edit an existing one from the list
If you’re creating a new mediation group, select the appropriate format, and select the appropriate platform. On the next page, give the mediation group a sensible name, and add the ad units that you want to use. If you are editing an existing group, skip this step:
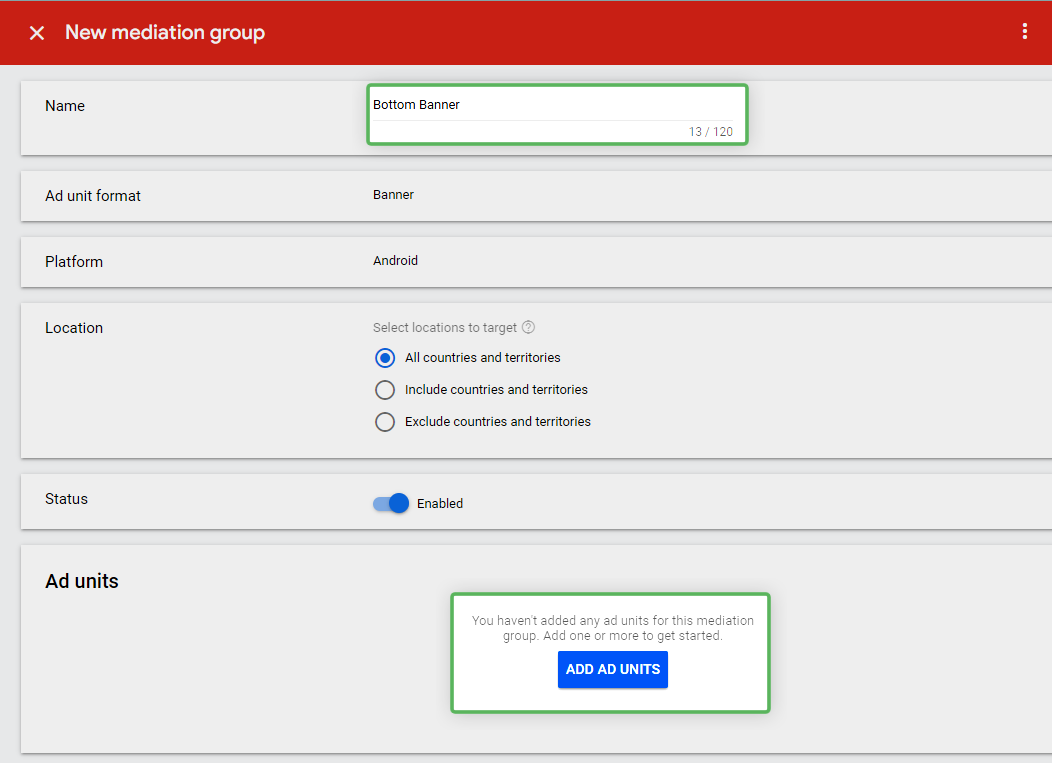
Configure the basic mediation group settings
Once your mediation group is configured, look for the "Waterfall" section and click "Add Custom Event"
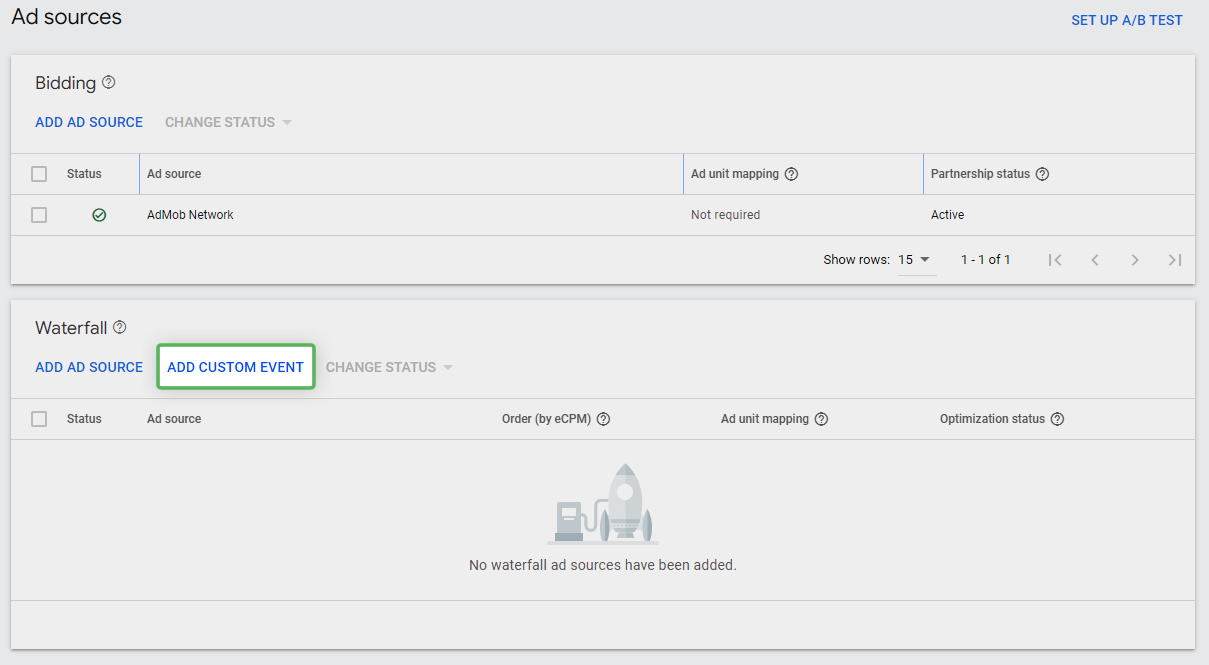
"Add custom event" button allows you to add our custom adapter
This allows you to add our custom adapter into your waterfall. Give it an appropriate name for your placement and set the average CPM that you expect to receive:
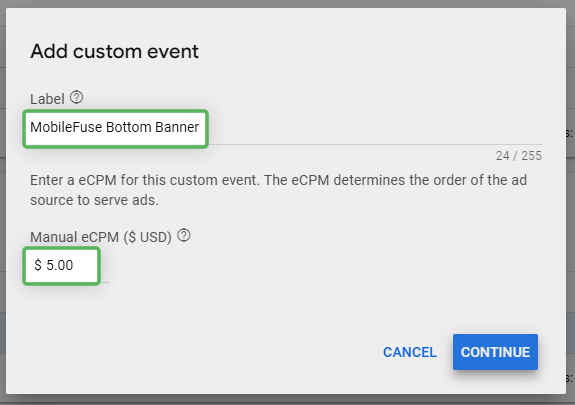
Specify a label of your choice, and your CPM
Click Continue, then configure the MobileFuse custom adapter. The following settings should be used:
| Unit Type | Parameter | Class Name (Android) | Class Name (iOS) |
|---|---|---|---|
| Banner | { "appKey": "XXXX_XXXXX", "placementId": "XXXXXX" } | com.google.ads.mediation.mobilefuse.MobileFuseBanner | MobileFuseBannerCustomEvent |
| Interstitial | { "appKey": "XXXX_XXXXX", "placementId": "XXXXXX" } | com.google.ads.mediation.mobilefuse.MobileFuseInterstitial | MobileFuseInterstitialCustomEvent |
| Rewarded | { "appKey": "XXXX_XXXXX", "placementId": "XXXXXX" } | com.google.ads.mediation.mobilefuse.MobileFuseAdapter | MobileFuseRewardedCustomEvent |
The actual value of Parameter will be sent to you from your MobileFuse rep.
NoteEven though parameter is marked as optional in the console, it is required for the MobileFuse custom adapter.
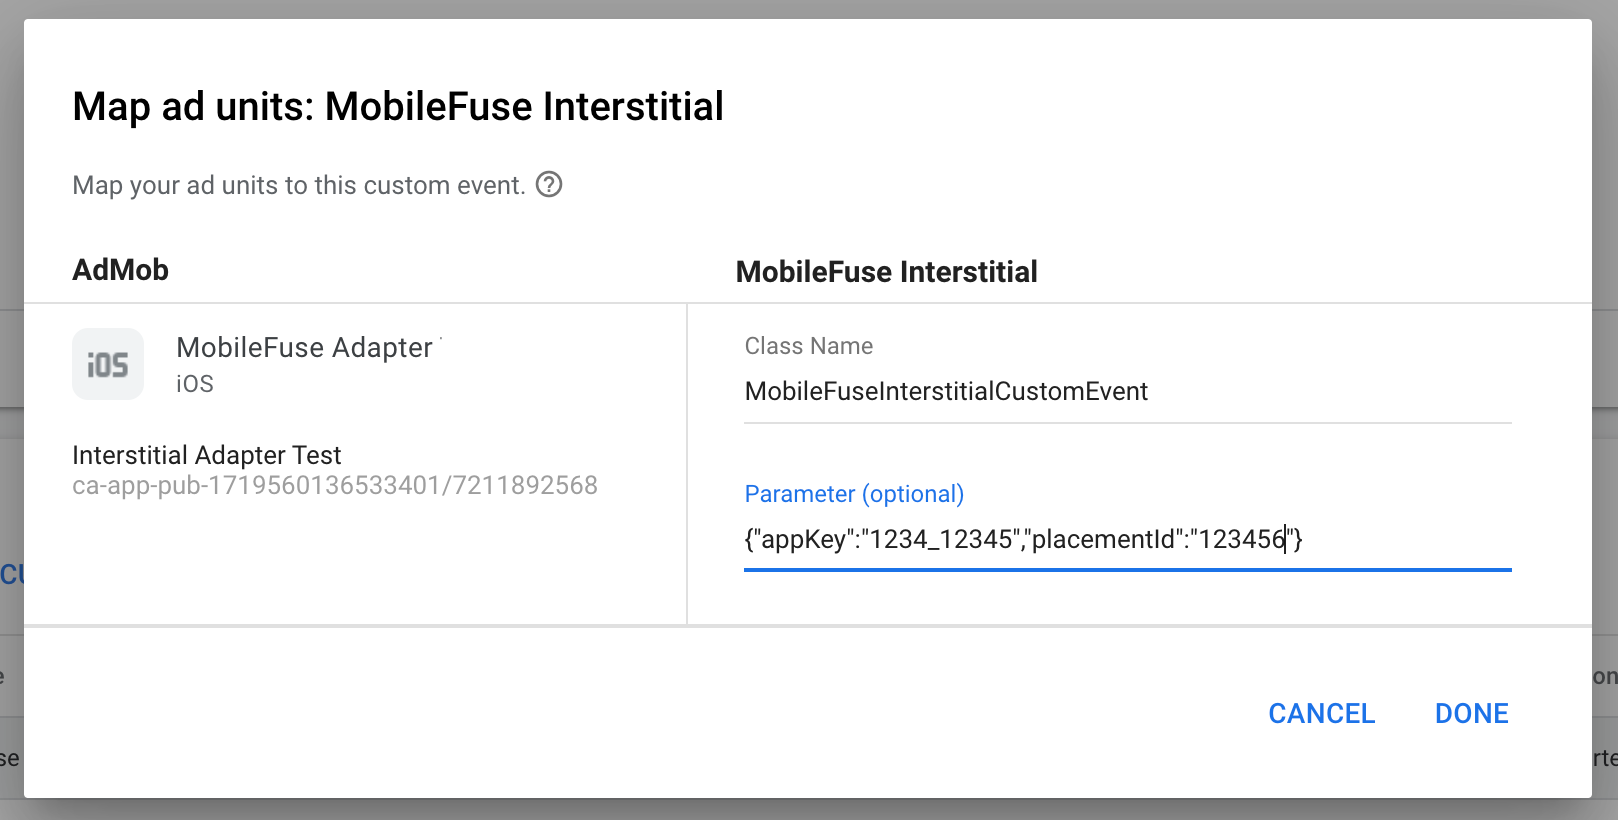
Configure the class name and parameters
After filling out the above information, press "Done", and ensure that MobileFuse is now visible in the list of networks:

Ensure that the network appears in your waterfall
Save the waterfall and ensure that it’s set to active.
Updated 3 months ago